Feature spotlight
QR scanning
Use scanning workflows to reduce manual entry, improve speed, and increase inventory accuracy throughout warehouse operations.
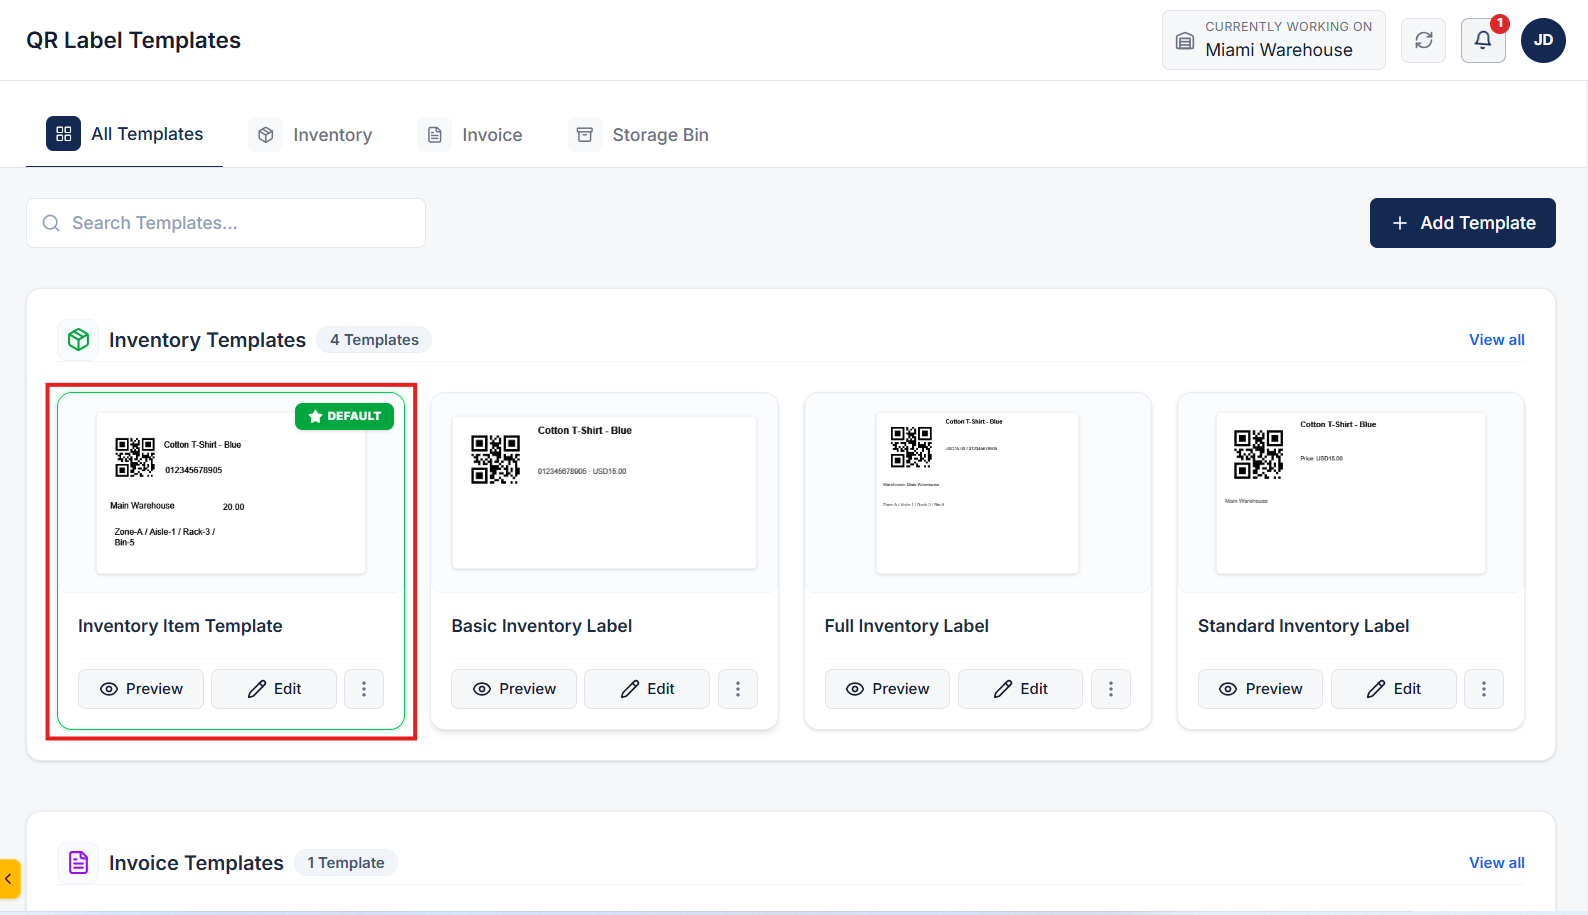
Step 1: Navigate to QR Templates under Administration
Go to the QR Templates page located under the Administration section in the main navigation menu.
On this page, you can manage all your templates for inventory items, invoices, and storage bins.
Step 2: Manage Existing QR Templates
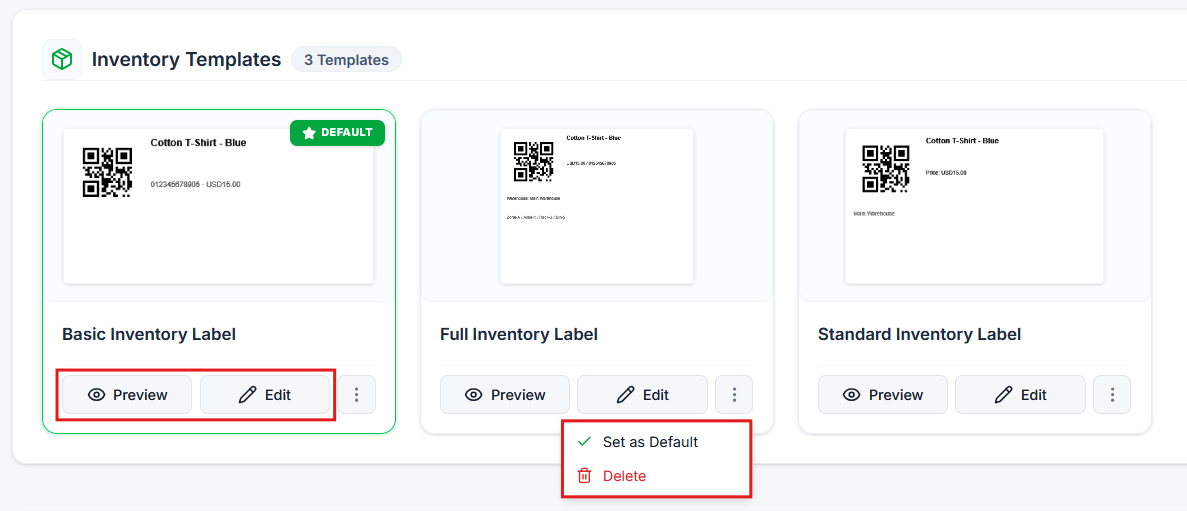
On the QR Templates page, easily manage your existing layout configurations:
- Click Preview to view a quick preview of any template.
- Click Edit to open and modify an existing template layout.
- Click the 3 dots menu (more options icon) next to any template to Delete it or set it as your Default template.
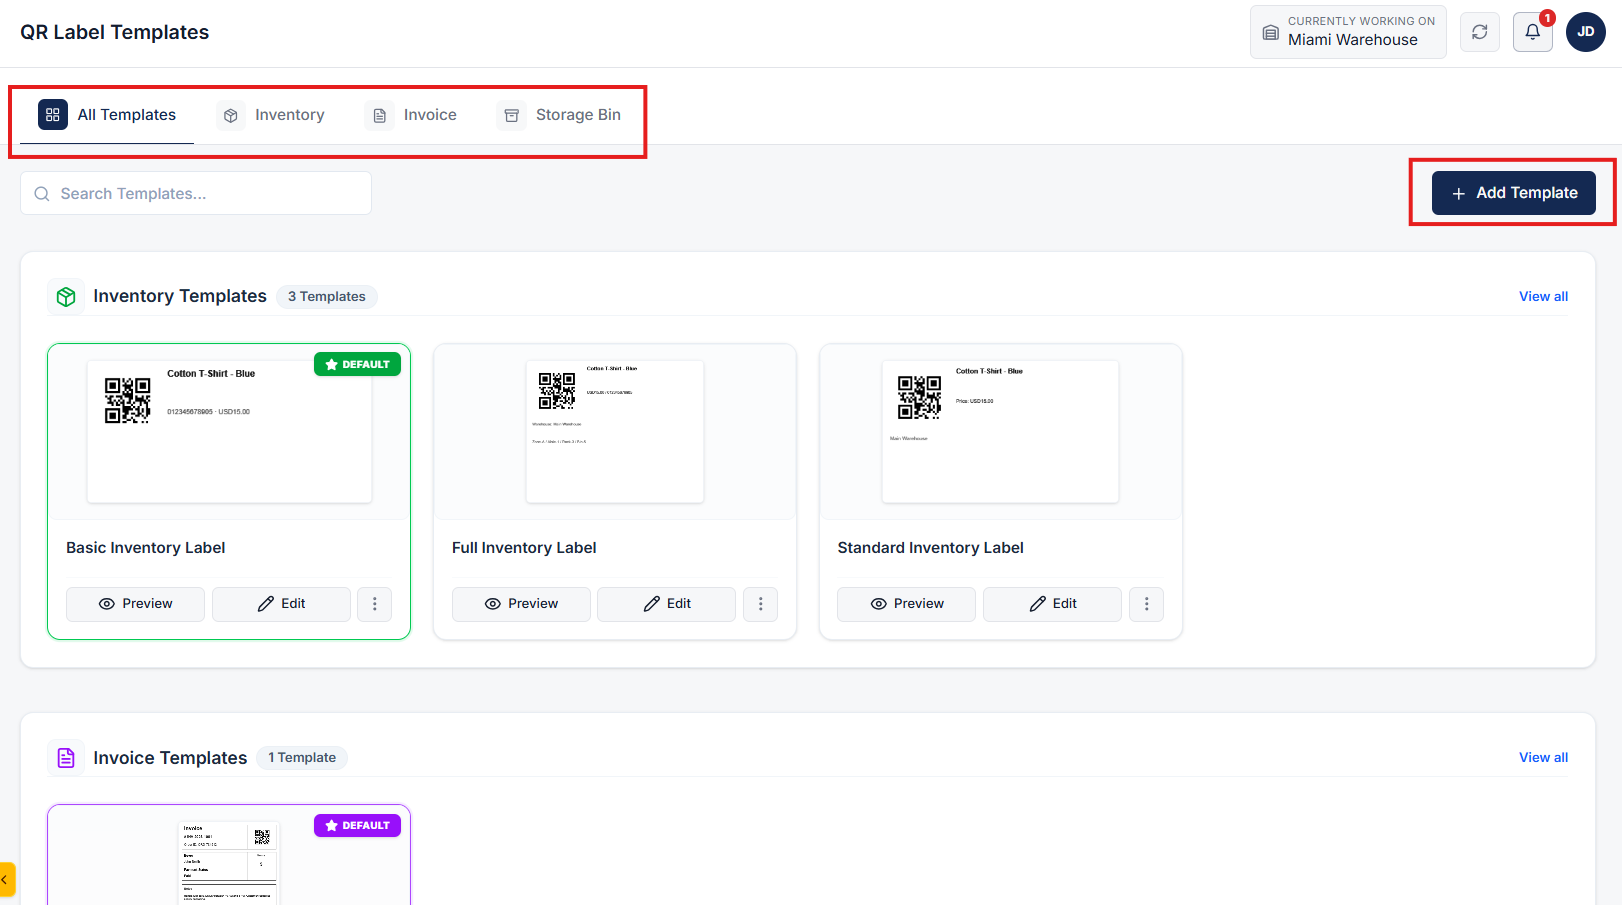
Step 3: Add a New Custom QR Template
To create a customized template, click the Add Template button at the top of the page.
This will open the template builder interface where you can configure custom dimensions, layout elements, and sample data.
Step 4: Configure Layout Settings
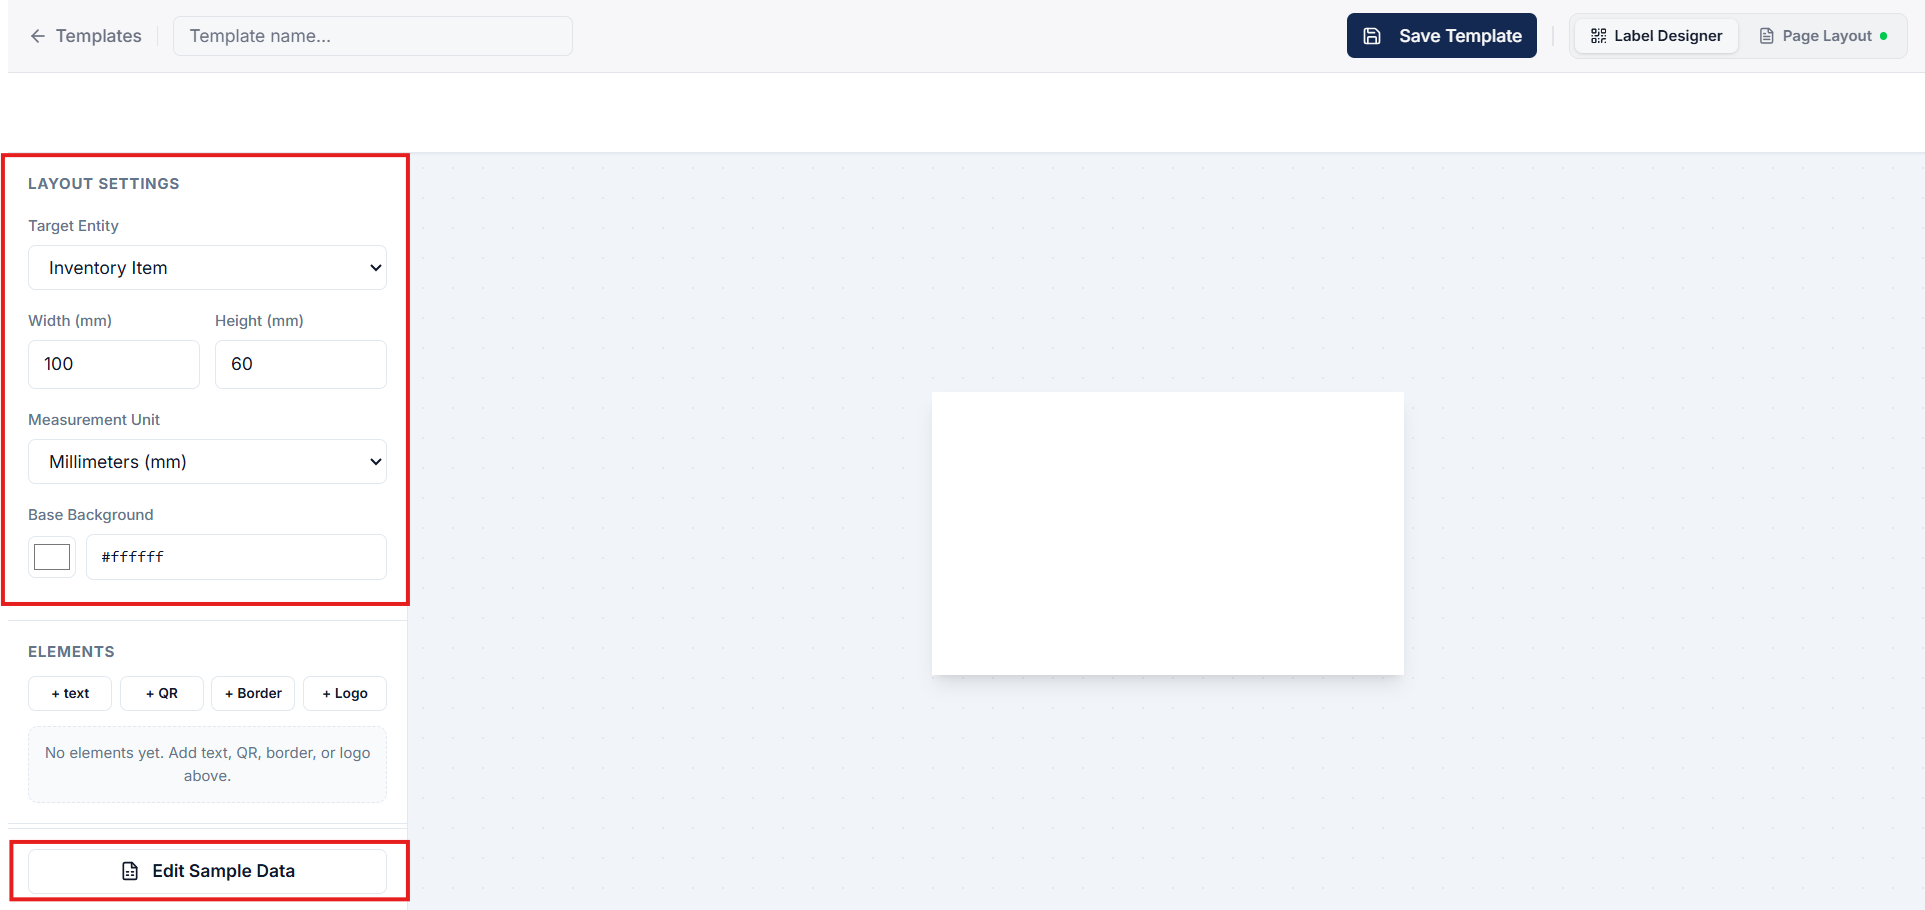
In the builder, start by defining the core layout settings for your QR code label:
- Target Entity: Select the entity type for this template (Inventory Item, Storage Bin, or Invoice).
- Measurement Unit: Choose your preferred unit of measurement (mm, cm, in, or px).
- Dimensions: Specify the target label Height and Width.
- Base Background Color: Set the base background color for the QR label layout.
Step 5: Edit Sample Data for Live Preview
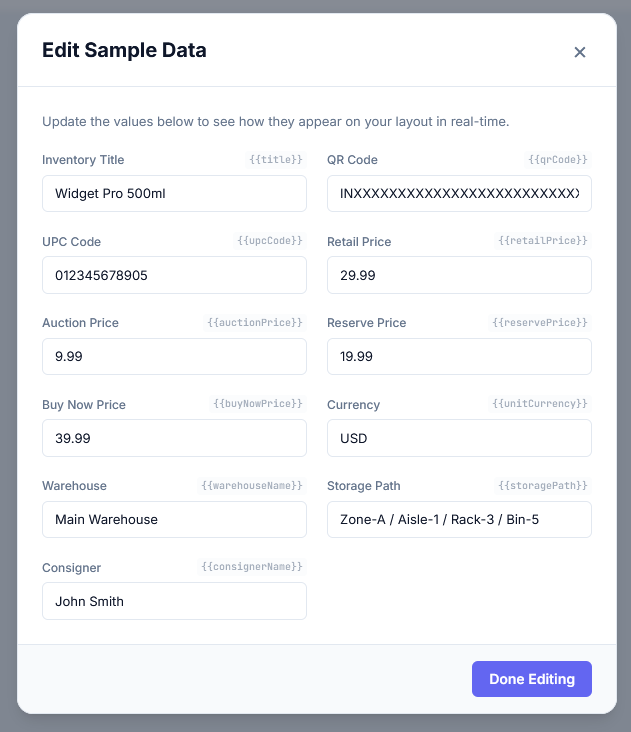
Click the Edit Sample Data button to open the preview sample data popup.
In this popup, customize sample text and data values to see how dynamic fields will appear directly on your layout preview. Click Done Editing to save the customized values and return to the canvas.
Step 6: Add & Position Dynamic Elements
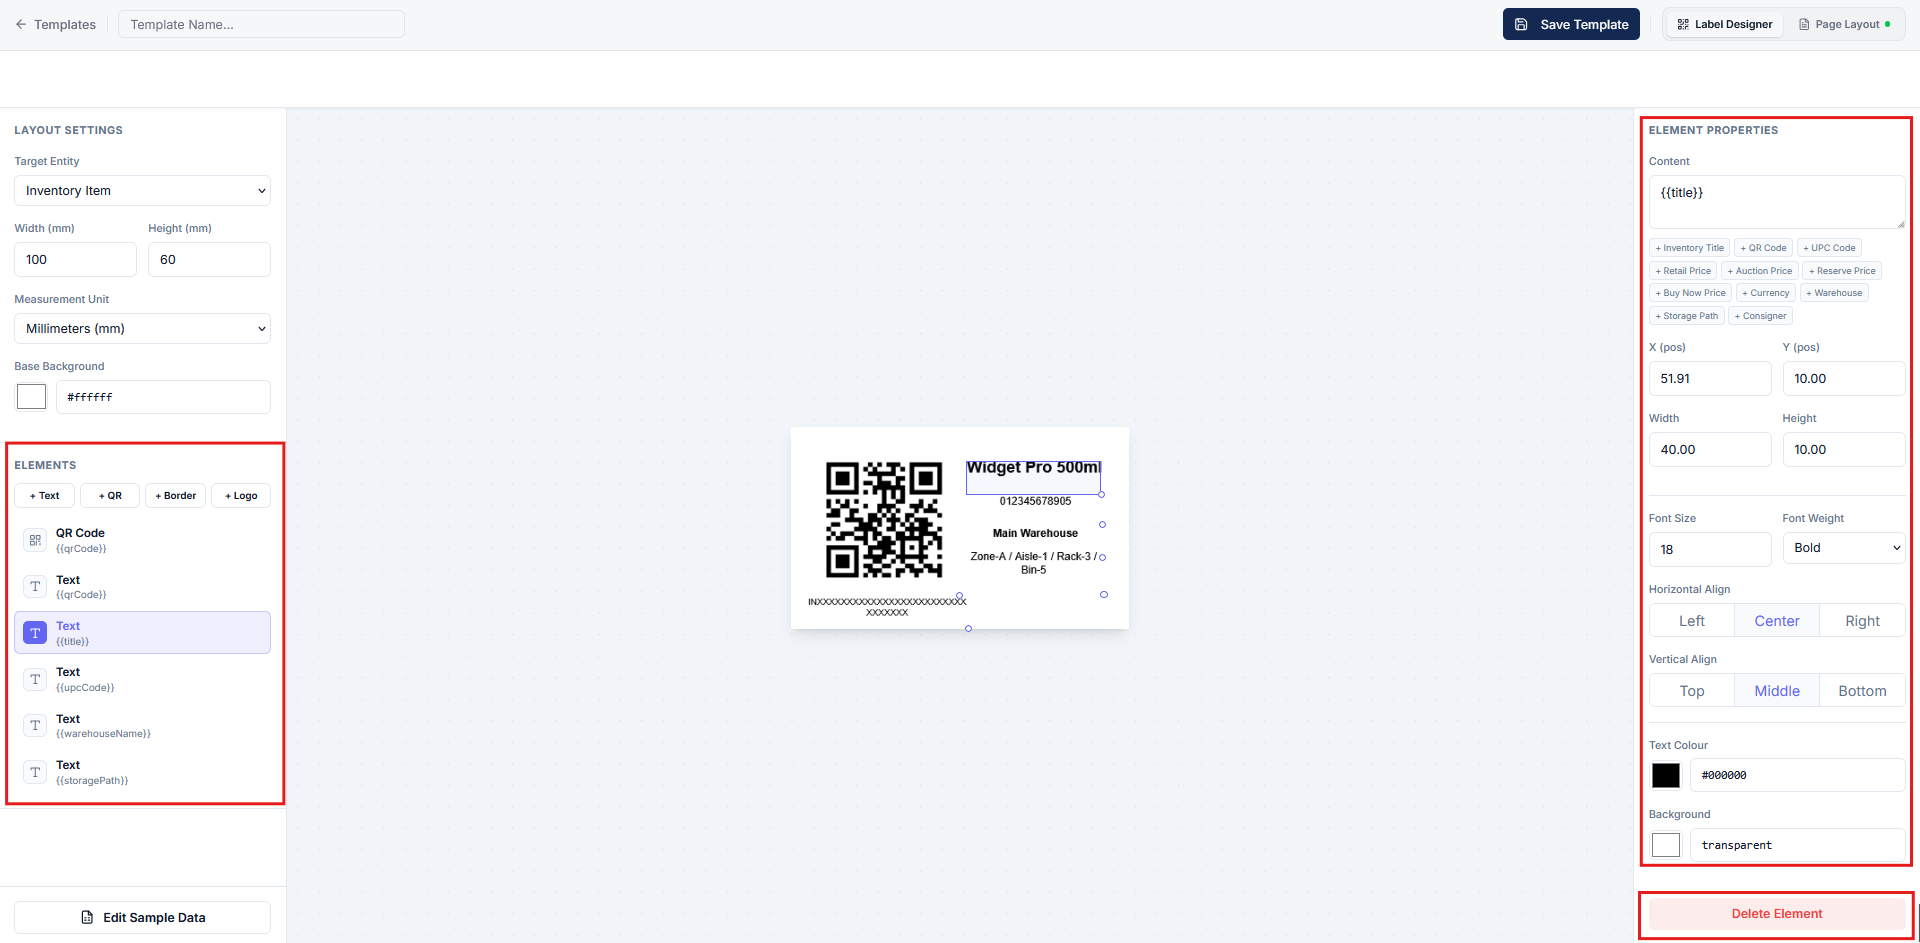
In the Elements section, click on any element you want to place on your template:
- Move & Resize: Drag elements directly on the template canvas preview to adjust their positions, or drag their boundary handles to resize them.
- Configure Element Properties: Select an added element to open its Element Properties panel and customize details including:
- Content: Pick dynamic placeholder content from the available list (such as Inventory Title, UPC Code, Storage Path, etc.) to display in that element.
- Position: Fine-tune precise X & Y coordinate positions.
- Typography: Adjust Font Size and Font Weight.
- Alignment: Set Horizontal and Vertical text alignments.
- Colors: Customize Text Color and Background Color.
- Delete Element: Click the Delete Element button if you wish to remove a selected element from the canvas.
Step 7: Configure Page Preview & Sheet Settings
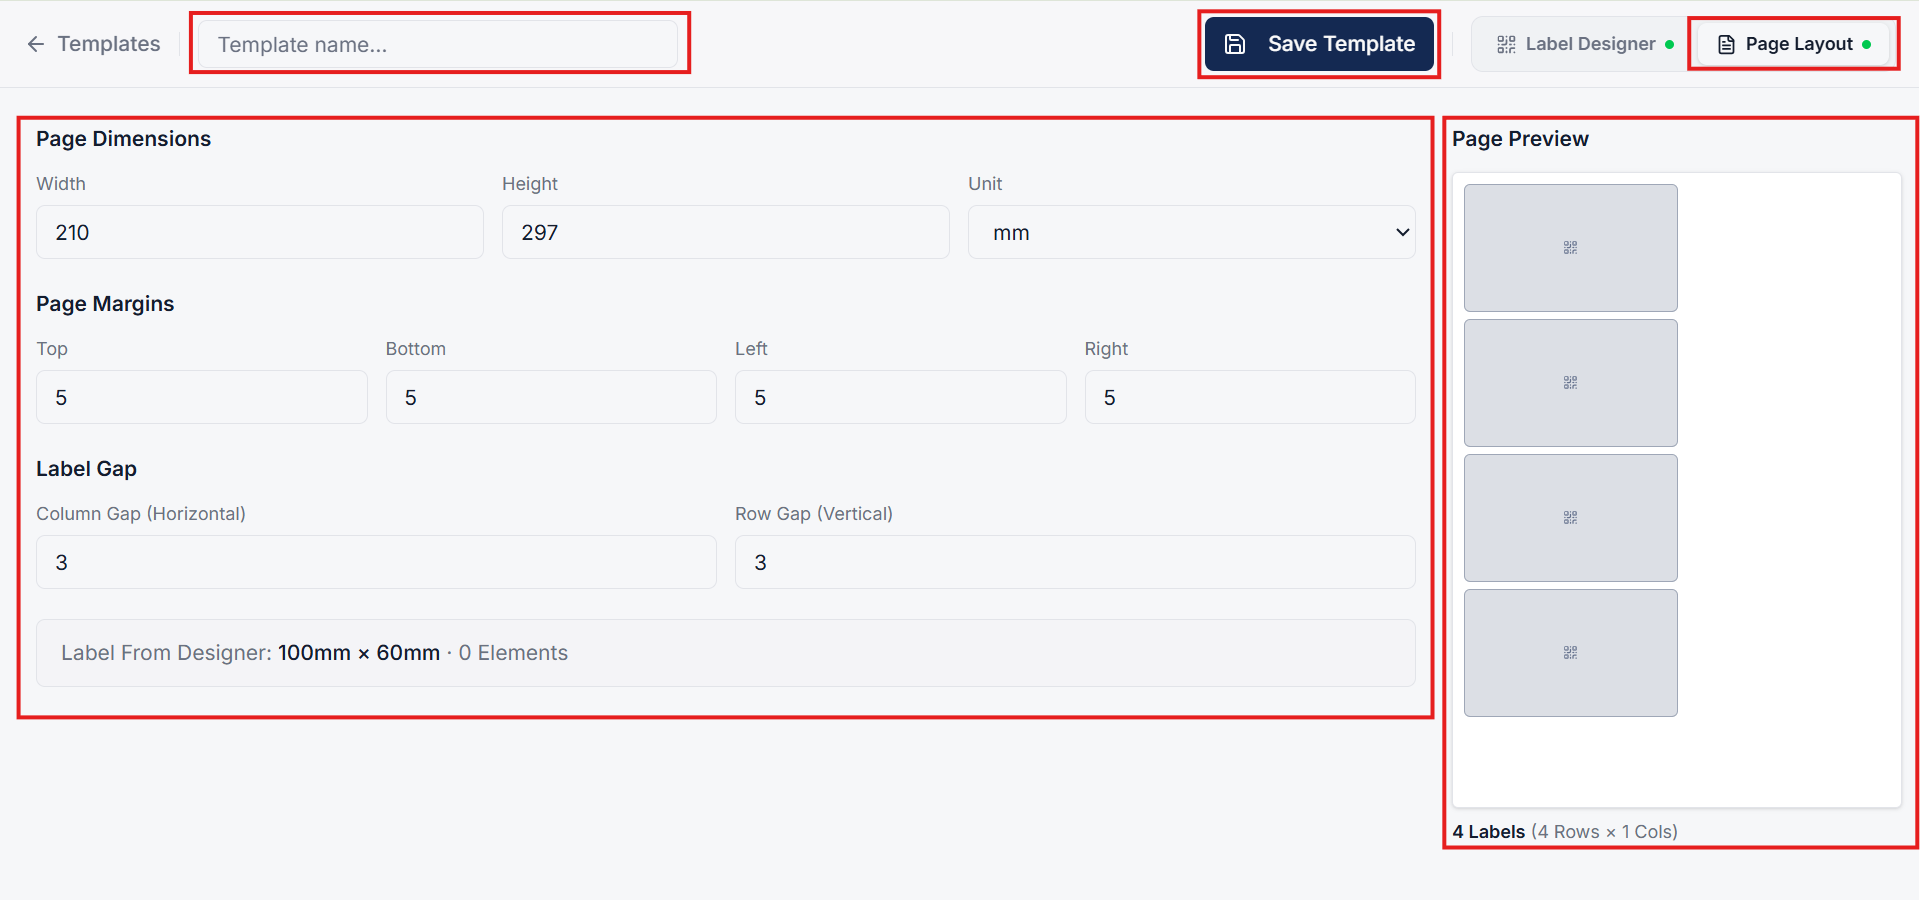
Switch to the Page Preview tab to see how multiple QR code labels render on a printed page layout:
- Customise sheet Page Dimensions.
- Adjust Page Margins.
- Set Label Gap spacing between printed labels.
Step 8: Save the Customized QR Template
Enter a descriptive Template Name in the designated field and click the Save Template button to persist your new QR layout.
Step 9: Utilize Templates for QR Scanning Workflows
Once created and saved, these custom QR templates can be printed and scanned across various operational workflows:
- Scan & Assign Storage Location: Rapidly assign inventory items to designated warehouse bins by scanning item and storage QR codes.
- Packaging Verification: Perform instant QR code scans during order packing jobs to verify items and update packaging statuses.
- Retrieve Inventory Details: Scan QR labels on items or bins to instantly pull up complete item details, specs, and status context.