Feature spotlight
Custom storage management
Set up storage structures that reflect your physical warehouse layout, naming rules, and operating needs.
Step 1: Go to Warehouse section
Navigate to the Warehouse section from the menu.
Click on the Add Warehouse button to create a new warehouse.

Step 2: Add warehouse details
A popup will appear where you need to enter the required warehouse information such as name, location, and other settings.
Ensure all necessary details are filled before proceeding.
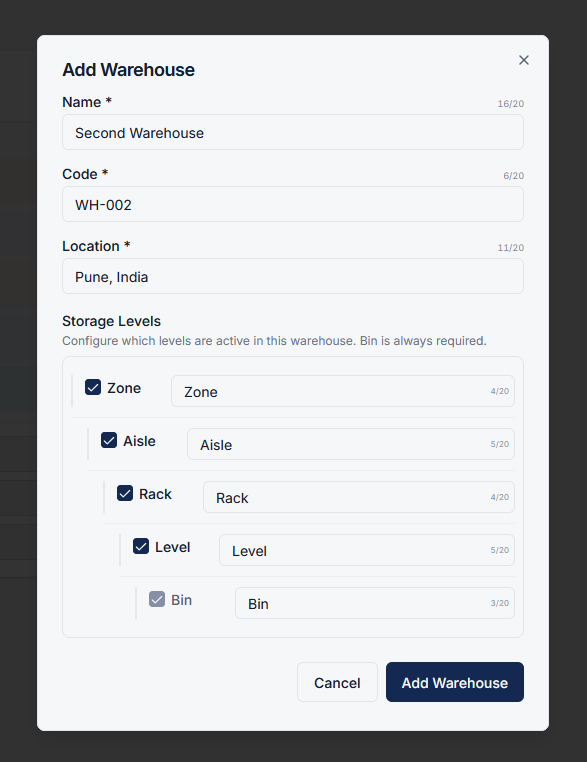
Step 3: Configure storage levels
In the Storage Levels section, you can customize how storage is structured for this warehouse.
- The default hierarchy is: Zone → Aisle → Rack → Level → Bin
- Bin level is mandatory and cannot be removed
- You can disable levels that are not required
- You can rename levels based on your business needs
Example:
- Rename Aisle to Section
- Remove Level if not needed
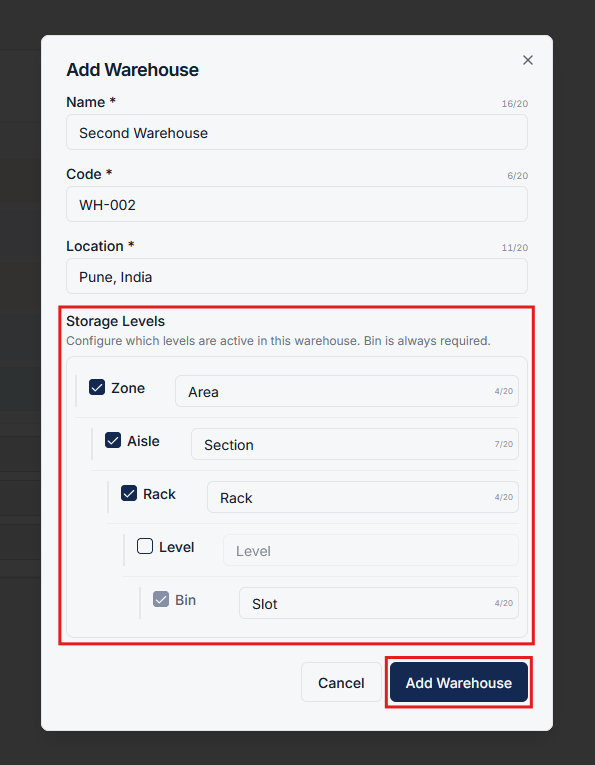
Step 4: Create customized warehouse
After configuring storage levels, click on Add Warehouse.
The new warehouse will now use your customized storage structure, tailored to your workflow.
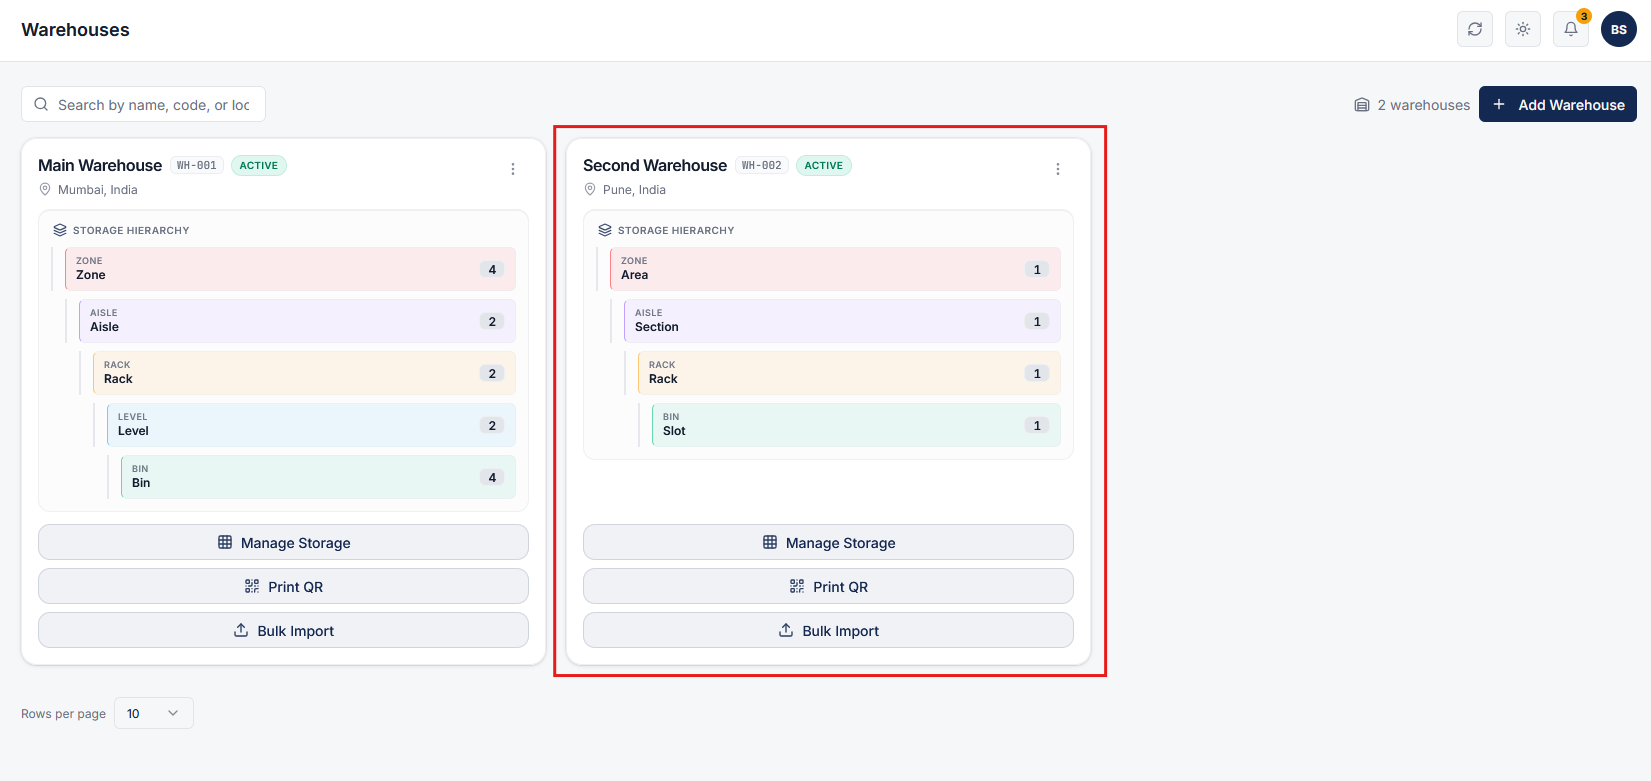
Step 5: Flexible and adaptive storage system
Custom storage management allows you to:
- Design storage based on your operations
- Simplify structure by removing unnecessary levels
- Adapt quickly to different warehouse requirements
This ensures your warehouse setup is flexible, efficient, and aligned with your business processes.