Feature spotlight
Customizable fields
Add, edit, and manage custom fields with auto-generated API keys, display order, and required settings so the right fields appear in the right forms.
Step 1: Go to Custom Fields section
Navigate to the Custom Fields section from the menu.
Here, you can manage and create custom fields for both inventory and buyers.
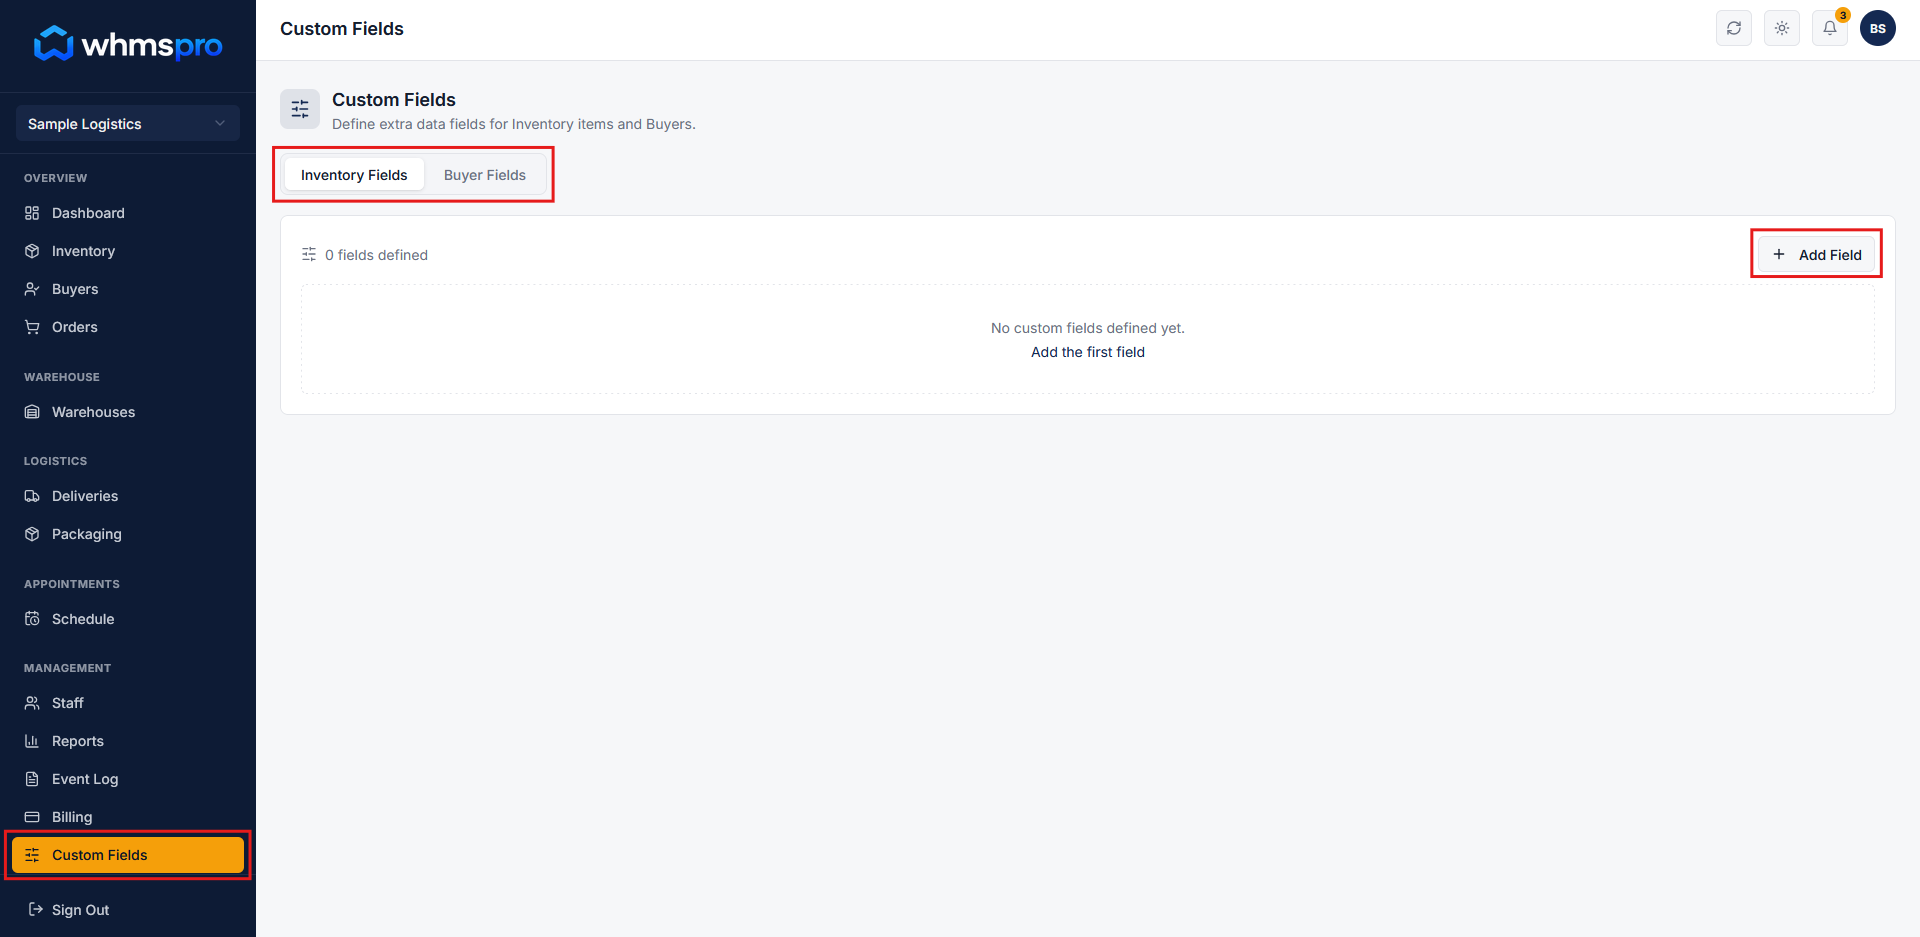
Step 2: Add a new custom field
Click on the Add Field button to create a new custom field.
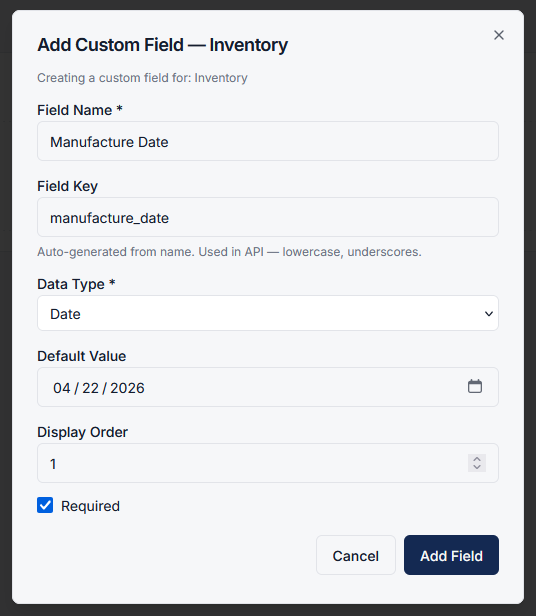
A popup will appear where you can configure all the required details.
- Enter Field Name
- Field Key will be auto-generated (lowercase with underscores, used in APIs), and can also be edited as per your requirement
- Select Data Type (text, number, date, etc.)
- Set a Default Value (optional)
- Define Display Order (position of the field)
- Check the checkbox to make this field required
Once configured, click on the Add Field button to save.
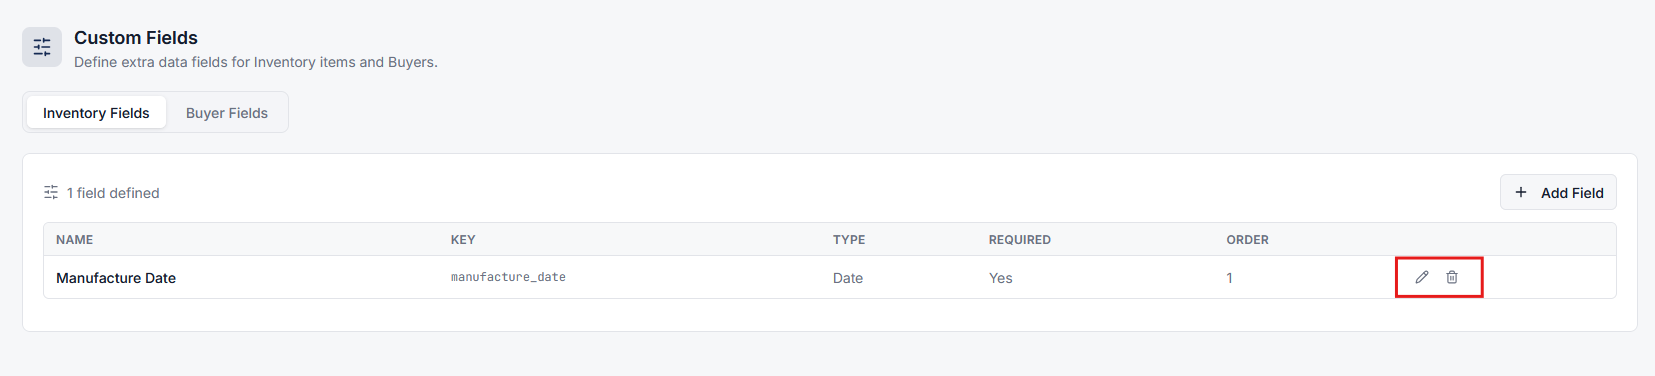
Step 3: Manage custom fields
After creating custom fields, you can easily:
- Edit existing fields
- Delete fields that are no longer needed
This allows you to keep your data structure flexible and up to date.
Step 4: Use custom fields in forms
Once a custom field is added (e.g., for inventory), it will automatically appear in the relevant forms.
For example:
When adding a new inventory item, the newly created custom field will be visible in the Add Inventory form.

Step 5: Customize your data structure
Custom fields allow you to tailor the system according to your business needs.
You can create different fields for inventory and buyers, ensuring all necessary information is captured efficiently.