Feature spotlight
Custom roles & permissions
Set up role-based access in a few clear steps: create roles, define page-level permissions, assign roles to staff, and manage defaults as your team grows.
Step 1: Go to Staff section
Navigate to the Staff section from the menu.
Here, you can manage your team and define roles & permissions.
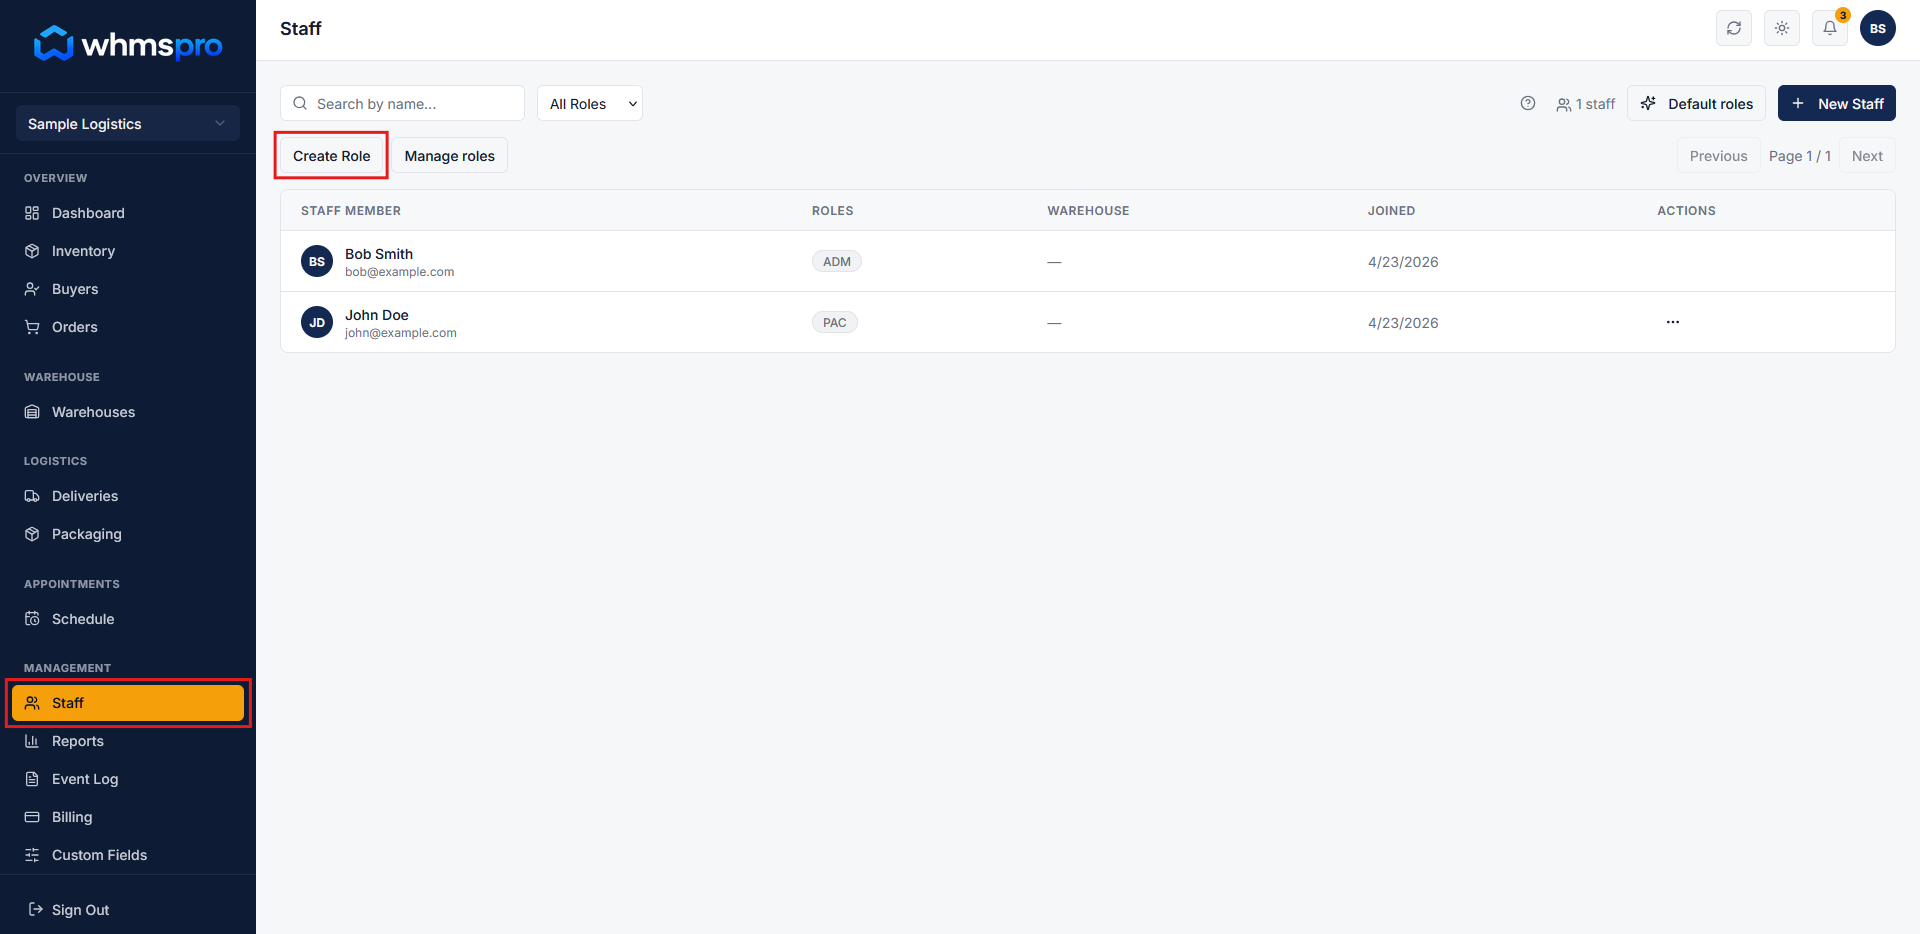
Step 2: Create a new role
Click on the Create Role button to add a new custom role.
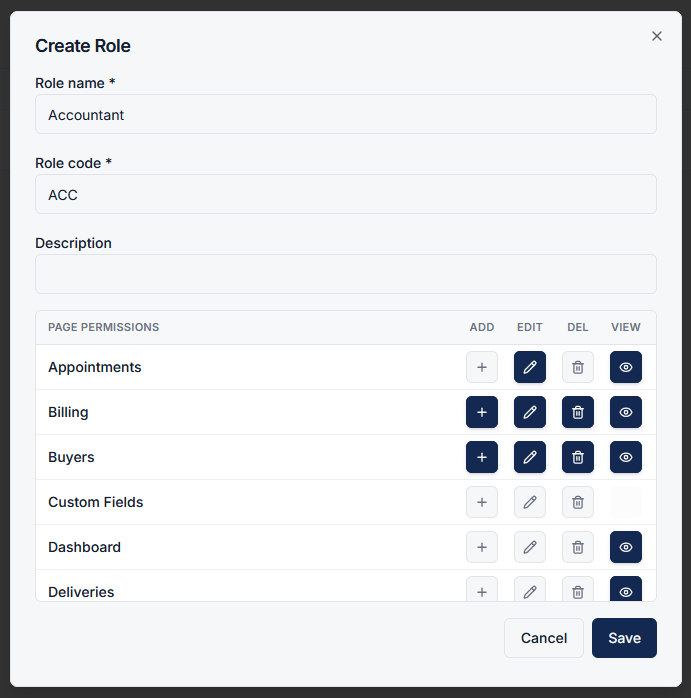
A popup will appear where you can configure role details and permissions.
- Enter Role Name
- Add Role Code (unique identifier for the role)
- Provide a Description (optional)
- Assign Page Permissions such as:
- Add
- Edit
- Delete
- View
Once configured, click on the Save button to create the role.
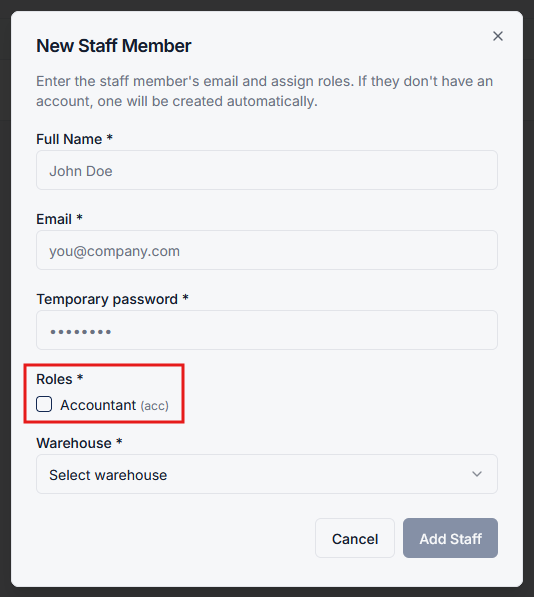
Step 3: Assign role to staff
After creating a role, go to add a new staff member.
In the Role section, you will see your newly created custom role available for selection.
This ensures each staff member gets the appropriate access based on their role.
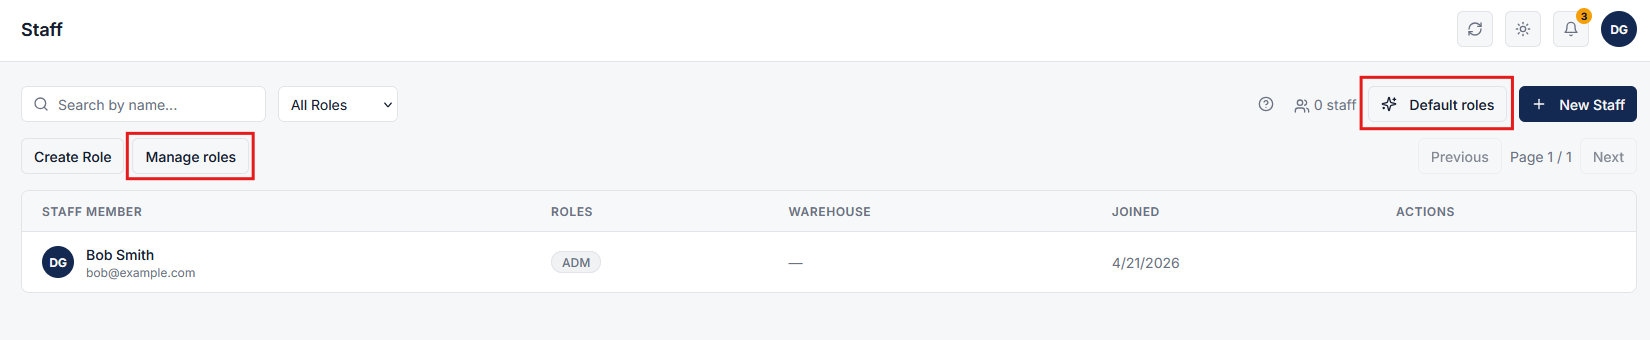
Step 4: Manage and use roles
Click on the Manage Roles button to view and manage all roles. You can Delete roles that are no longer needed.
You can also add predefined roles by clicking on the Default Roles button. This helps you quickly set up and maintain role-based access in your system.
Step 5: Control access efficiently
Custom roles and permissions allow you to define exactly who can access and perform actions within the system.
This ensures better security, accountability, and streamlined operations across your team.