Feature spotlight
Bulk storage creation
Create large sets of storage locations quickly so new warehouses and expansions can go live faster.
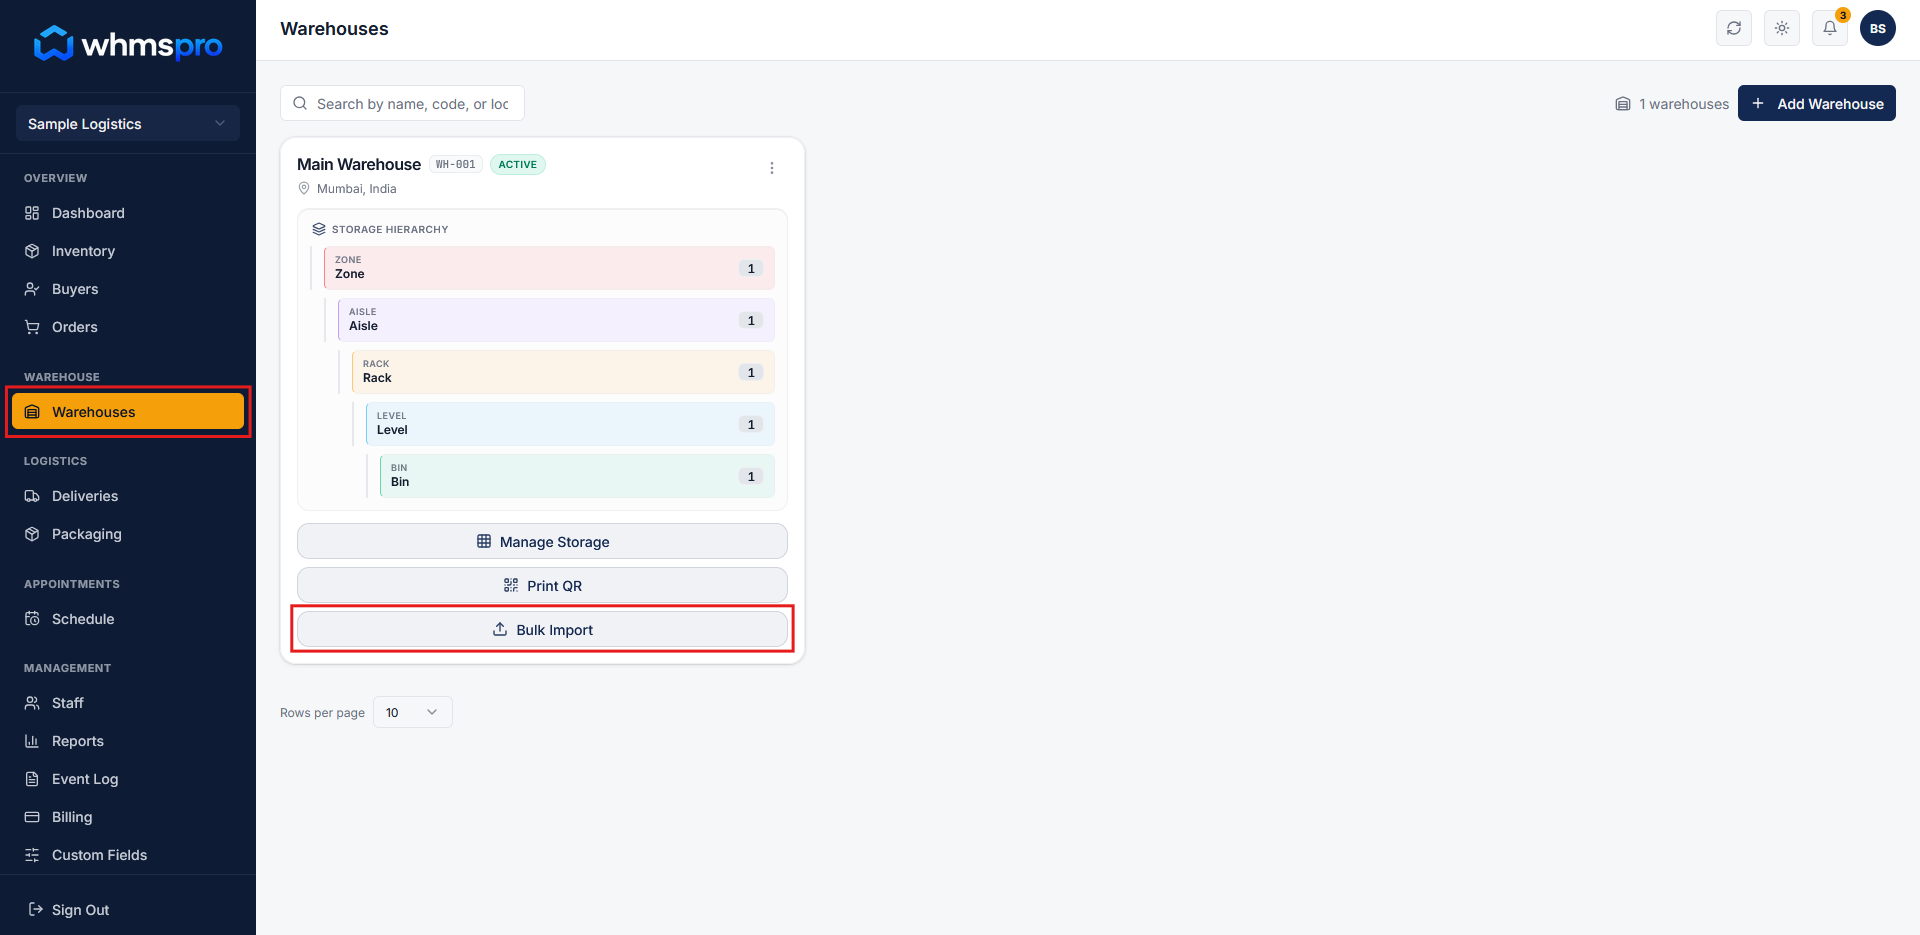
Step 1: Go to Warehouse and open Bulk Import
Navigate to the Warehouse section from the menu and select the warehouse where you want to add storage.
Click on the Bulk Import button to start adding storage in bulk using a CSV file.
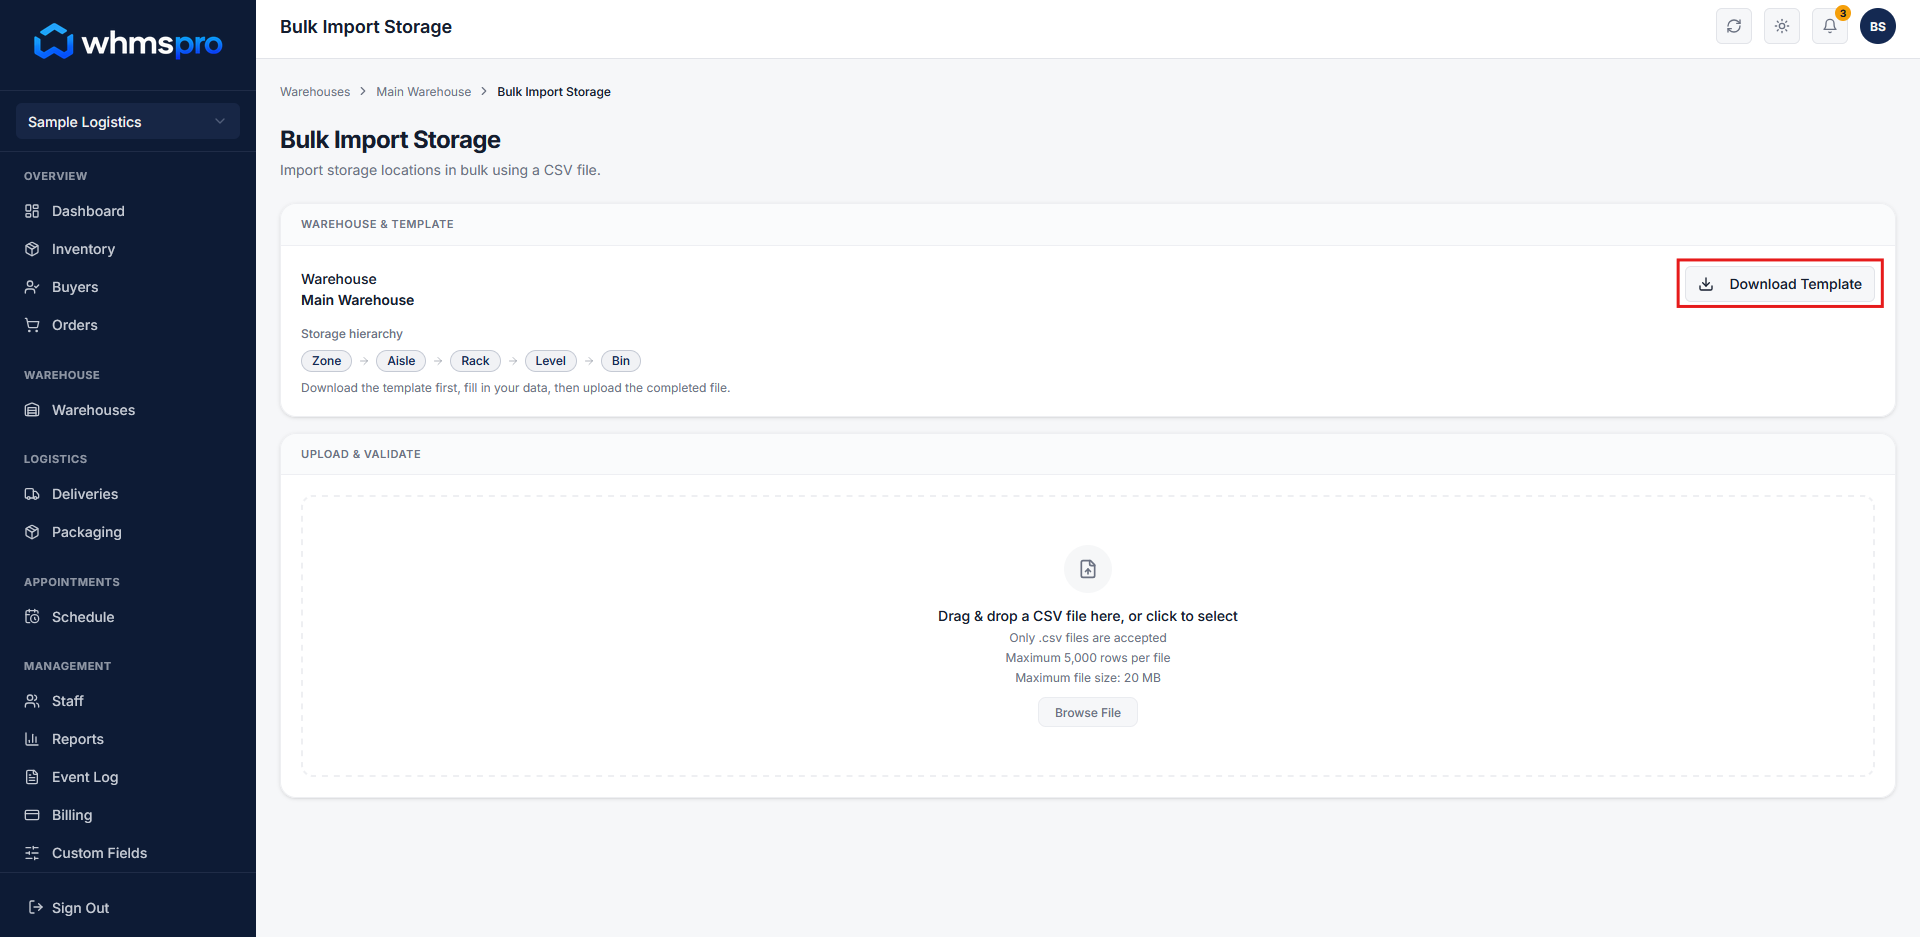
Step 2: Download and update template
Download the provided CSV template and update it with your storage data.
The template follows a structured format like: Zone -> Aisle -> Rack -> Level -> Bin
Example:
- Z1 -> A1 -> R1 -> L1 -> B1
- Z1 -> A1 -> R1 -> L1 -> B2
- Z1 -> A1 -> R1 -> L1 -> B3
Make sure all values are filled correctly and consistently as per the template.
Step 3: Upload and validate data
Upload the updated CSV file.
Review the import preview to validate your data before final submission.
Fix any errors if shown to ensure accurate data import.
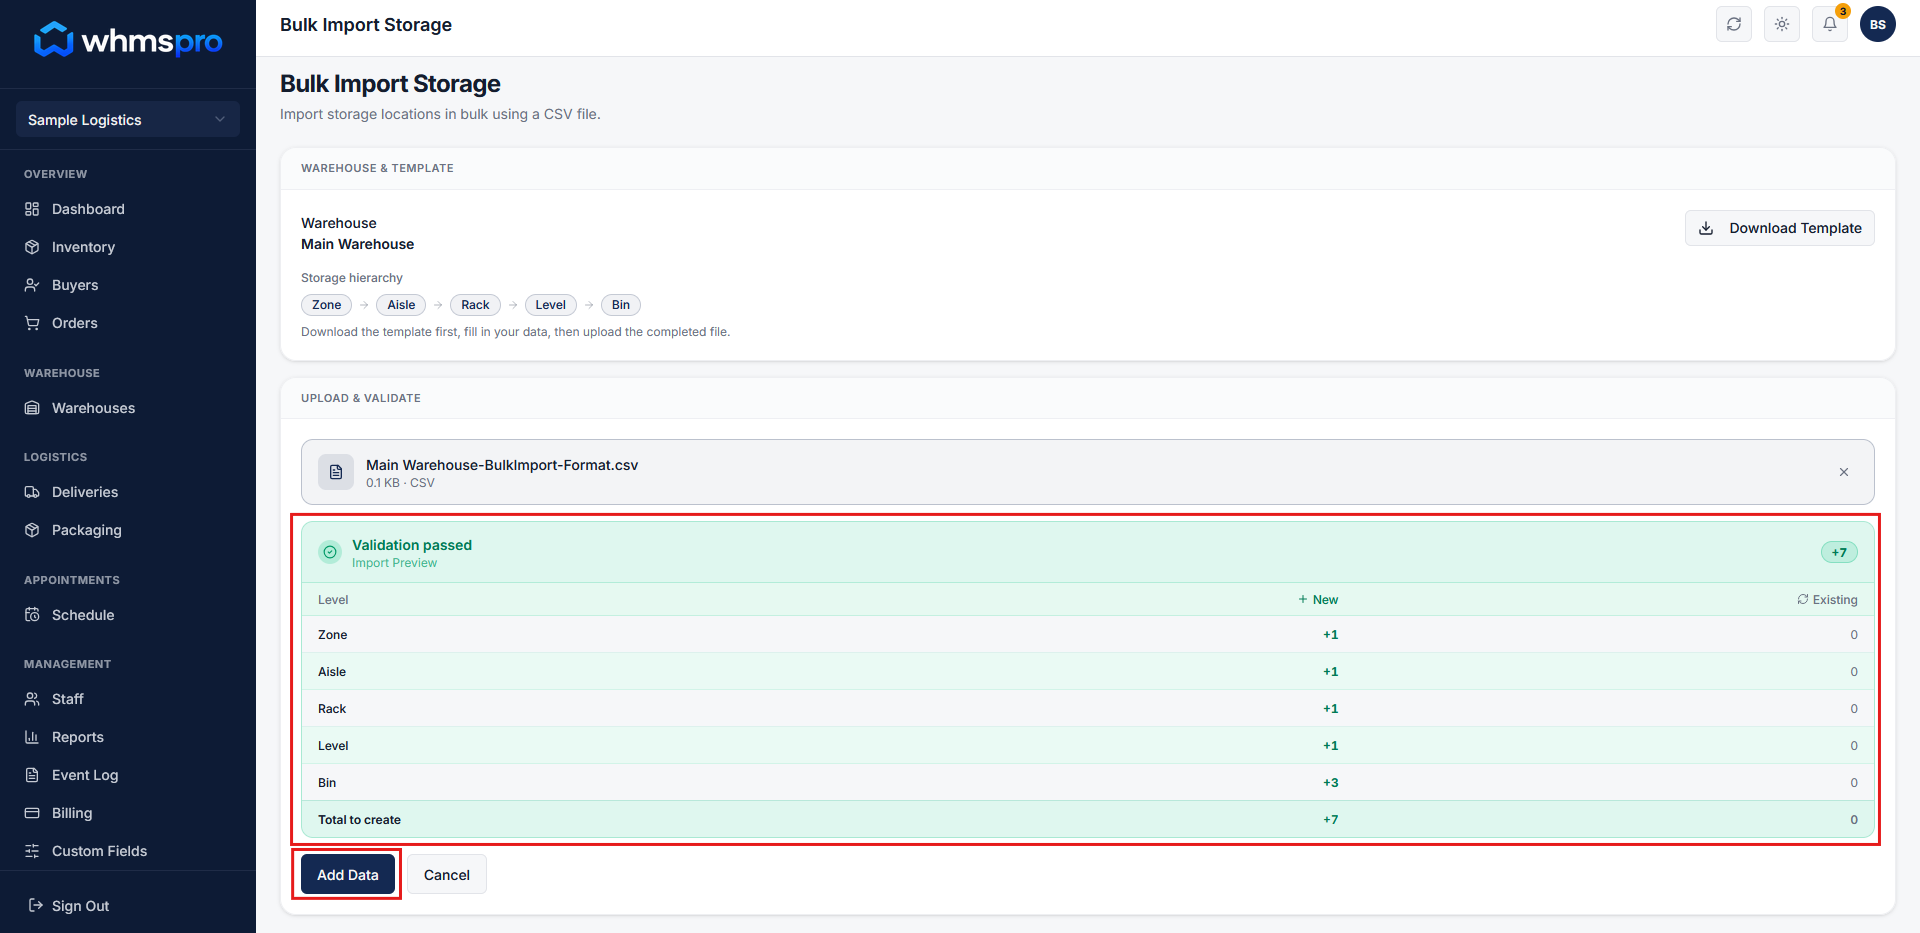
Step 4: Add storage in bulk
Click on Add Data to complete the import process.
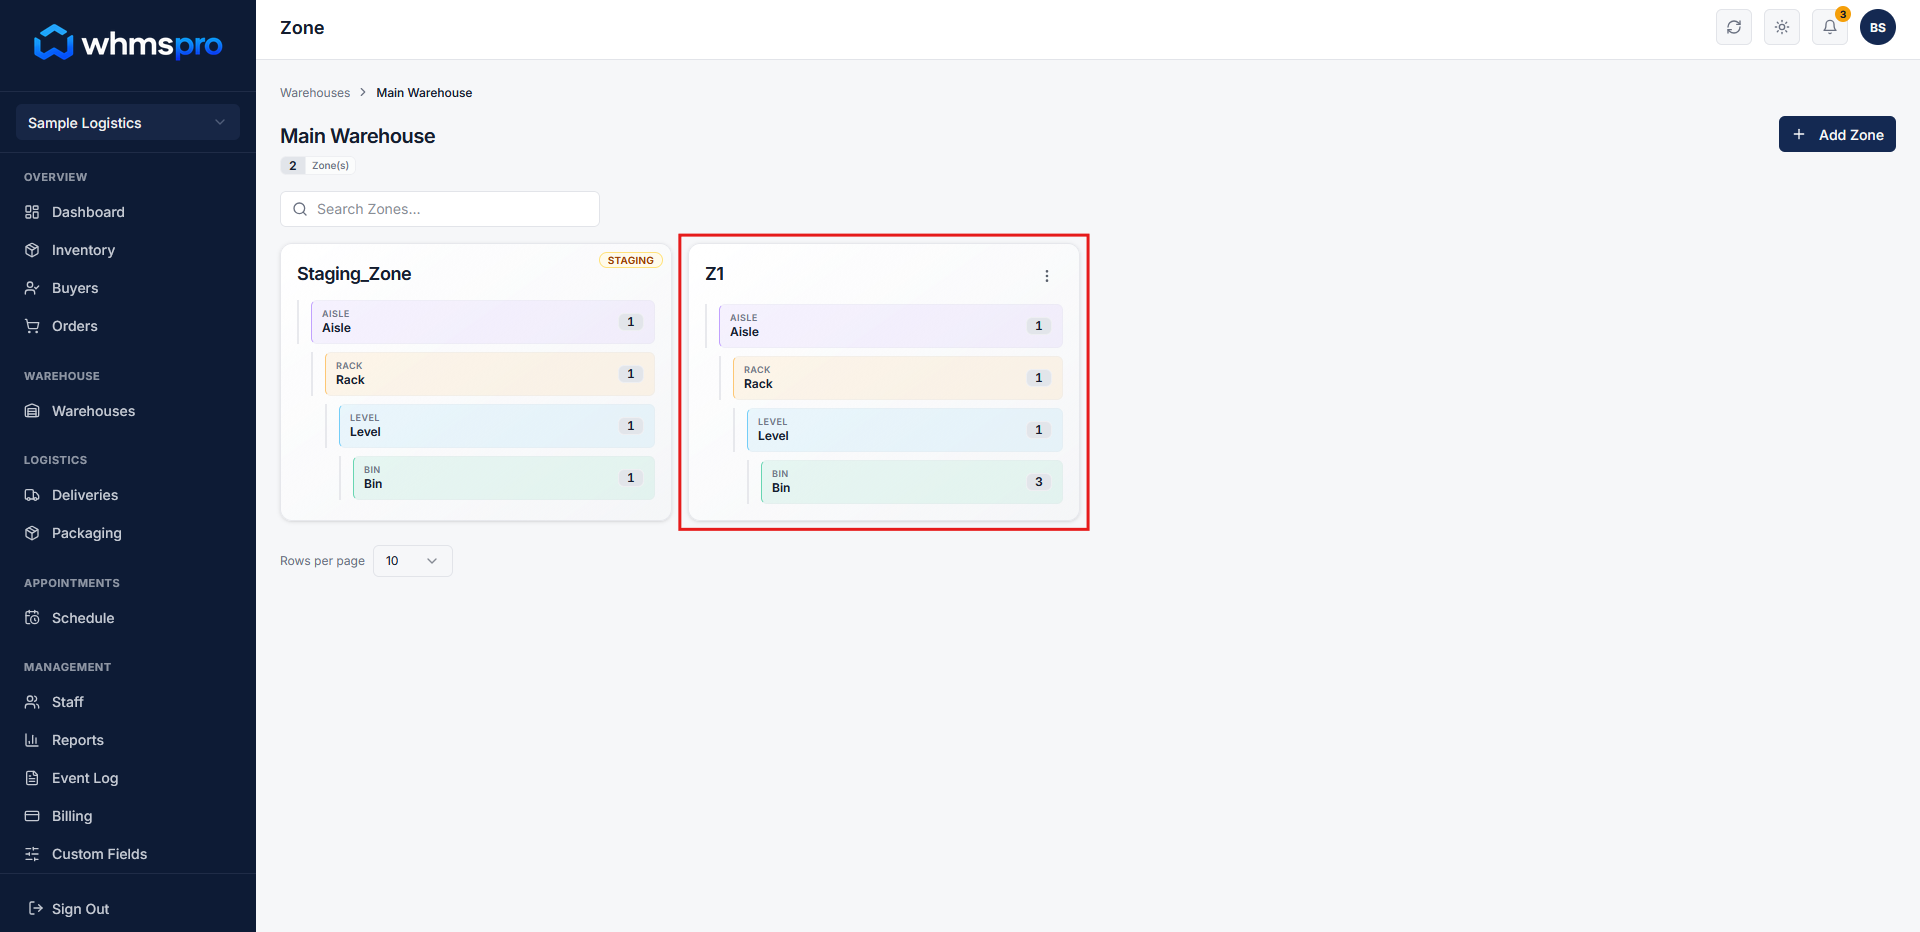
Once the process is successful, all new storage entries will be created automatically and will be visible in your warehouse.
Step 5: Faster and efficient setup
Bulk storage creation helps you:
- Add multiple storage locations in one go
- Reduce manual entry effort
- Maintain structured and consistent data
This ensures a quick and scalable warehouse setup.