Feature spotlight
AI content generation
Configure AI provider settings and credentials under Administration Settings to automatically generate product titles and descriptions directly from uploaded product images during inventory creation and editing.
Step 1: Navigate to AI Content Generation Settings
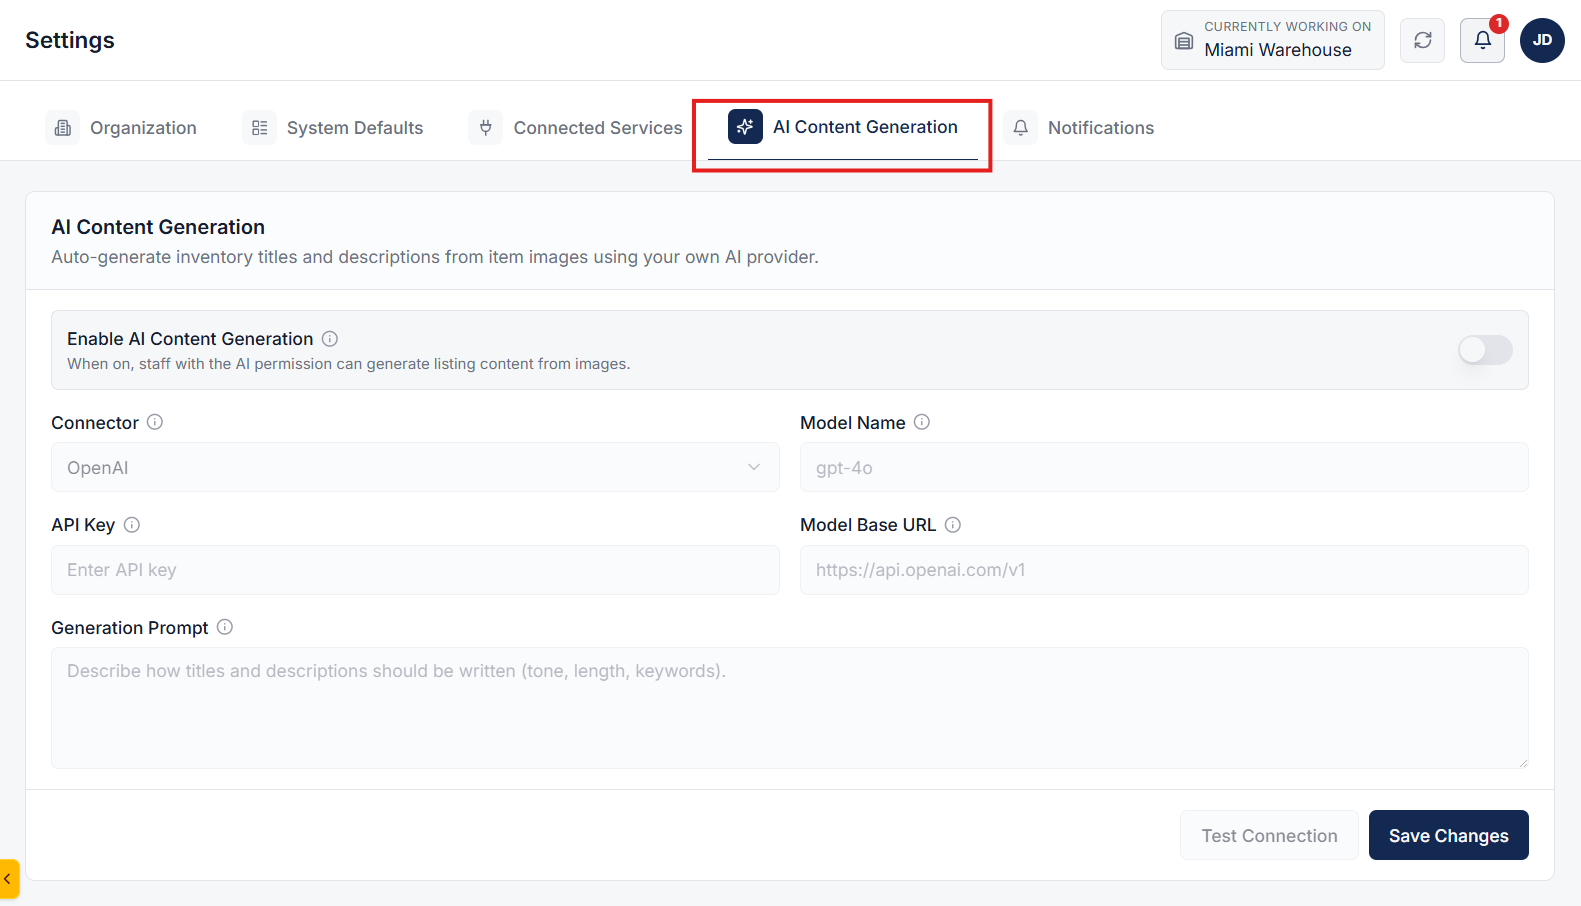
Go to the Settings page under the Administration section, then navigate to the AI Content Generation tab.
This section allows you to configure and manage your AI integration credentials and defaults.
Step 2: Configure AI Provider Credentials & Test Connection
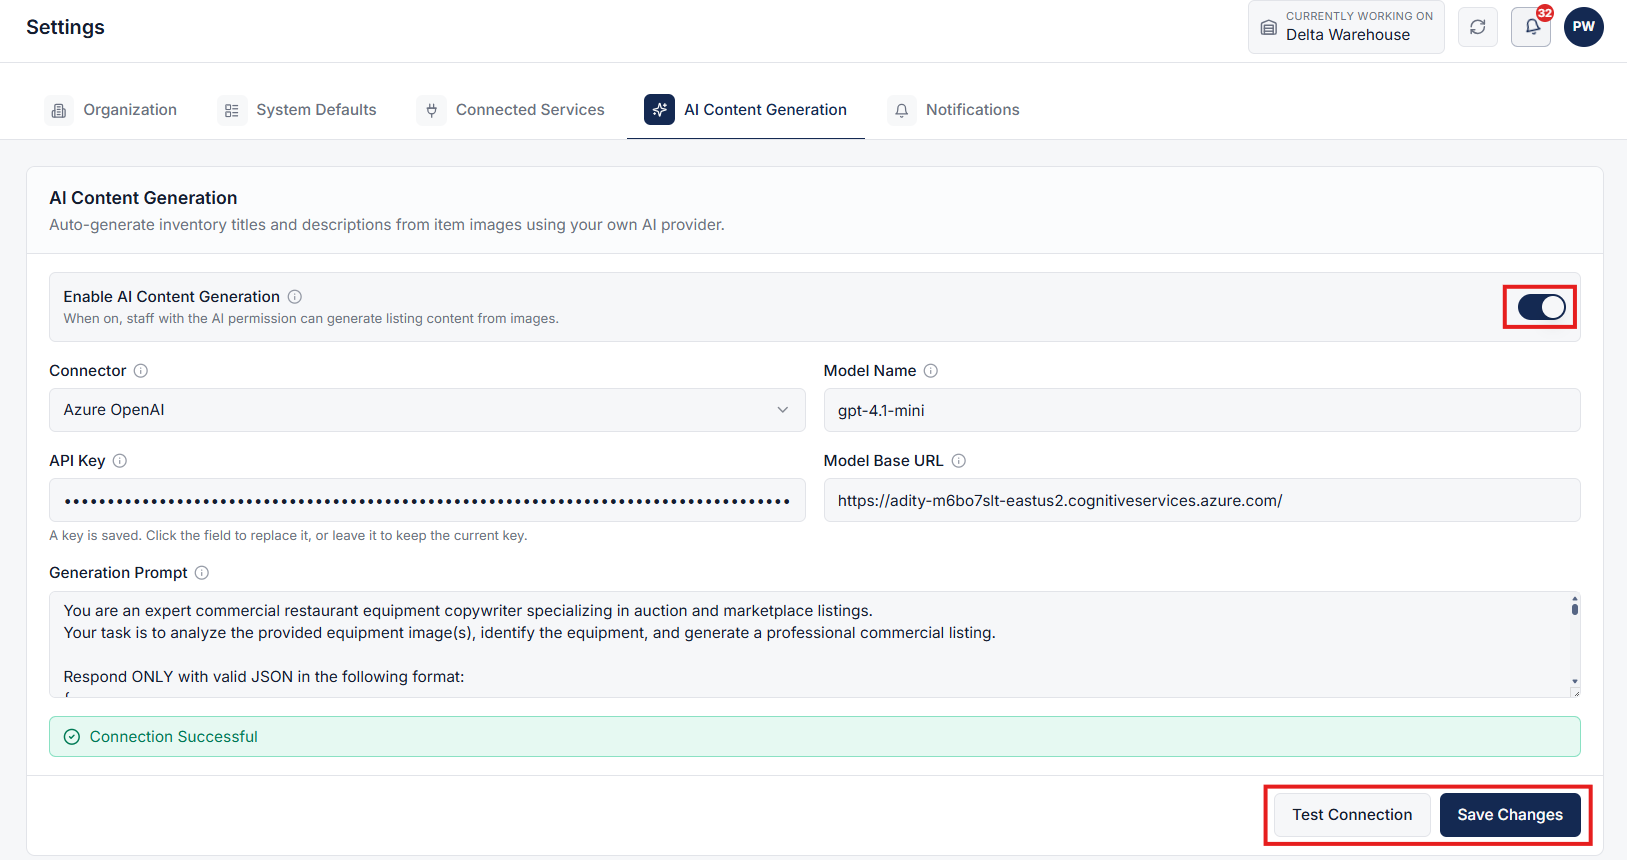
Enable the AI Content Generation feature by toggling the enable switch. Fill in your AI provider credentials and configuration details:
- Connector: Choose your AI provider. Pick OpenAI with a custom Base URL to use compatible providers like Groq or OpenRouter.
- Model Name: The exact model or deployment to call, such as
gpt-4o, your Azure deployment name, orgemini-1.5-flash. - API Key: Your provider API key. It is encrypted at rest and never shown again. Leave it blank to keep the saved key.
- Model Base URL: The provider's API base URL. Required for Azure OpenAI and OpenAI-compatible endpoints.
- Generation Prompt: Instructions sent with every generation to steer the tone, length, and keywords of the AI output.
Click on the Test Connection button to verify the configuration. Once the connection is successful, click Save Changes to store your configuration.
Step 3: Generate Title & Description for Inventory
Navigate to the inventory section and open the form to Add Inventory or Edit an existing inventory item.
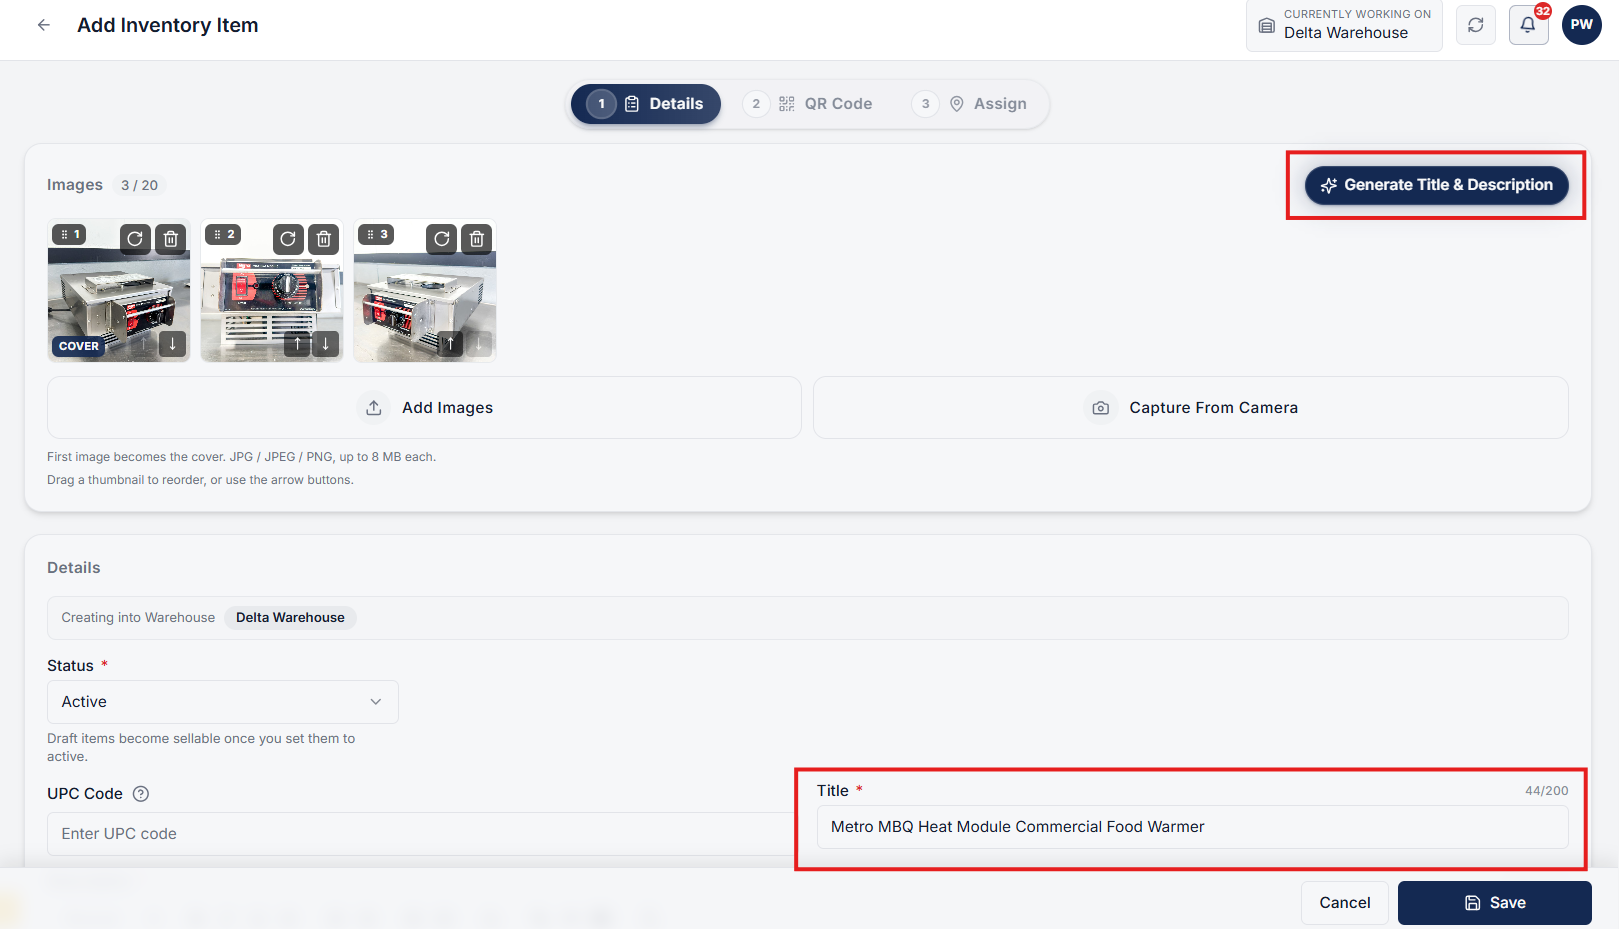
Upload product images and click on the Generate Title & Description button. The AI engine will analyze your uploaded product images and automatically generate an accurate title and detailed description for your product.